
How to Add a New Property
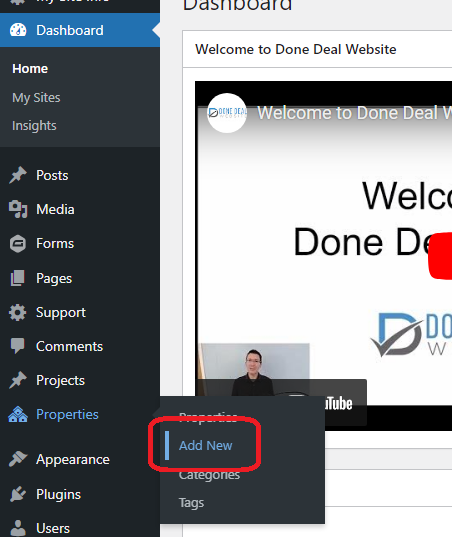
- From your Dashboard, hover over “Properties” and click “Add New”
- You will see a number of different fields you can fill in (Bedrooms, Bathrooms, etc.). Not all of the fields need to be filled out.
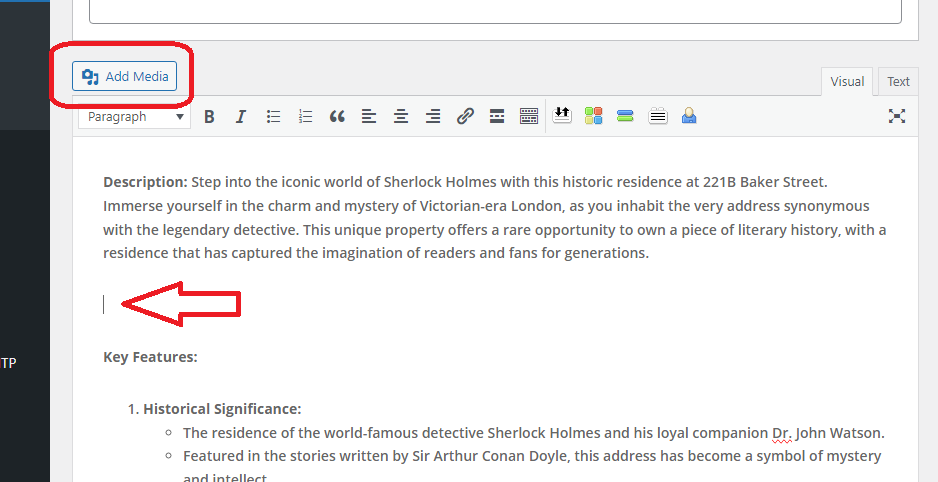
- Use the text editor below to add a detailed description.
- To add images, click in the text editor the part of the text you would like to add images to and then click the “Add Media” button. You can add a single image or create a gallery.
- To add a single image, click the image you would like to add, then click “Insert into page”
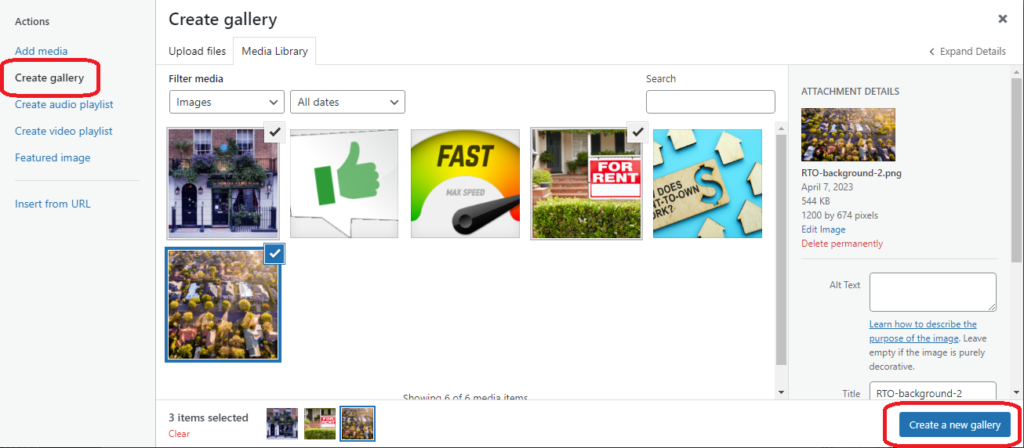
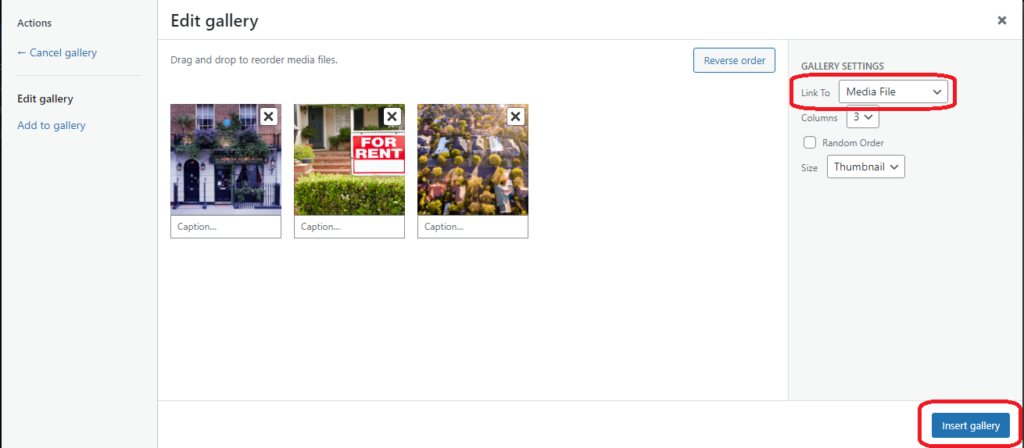
5b. To create a gallery, click “Create Gallery” on the left hand side menu, select the images you would like to add and then click “Create a New Gallery” in the bottom right. You will then see a “Gallery Settings” section on the right. Change “Link to” to “Media File”. Then click “Insert Gallery”
6. You can add your property listing to a category. There are a few categories to choose from or you can make your own. (You don’t need to add the property listing to a category if you don’t want to.)

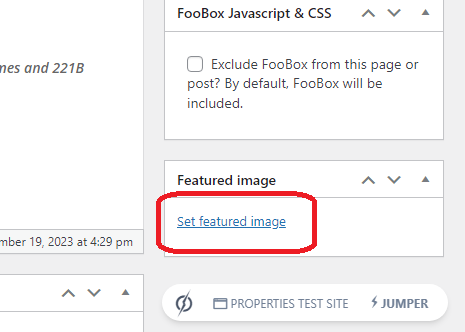
7. Finally, don’t forget to add a featured image. This is the image that will appear before someone opens the property. One the right hand side menu, scroll down until you see “Set Featured Image”. Select the image you want and then click “Set Featured Image”.
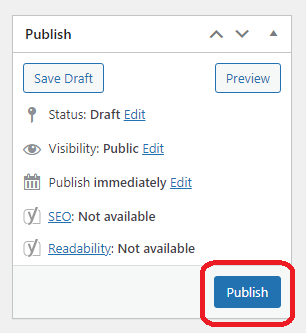
8. When you are ready to add your property listing to your site, click “Publish”.
Your new property is now on your site, to see your properties page, go to your website address /property.
If you would like to add your properties page to your menu, check out our tutorial on Editing Your Site Menu.
How to Edit Your Properties
- From your Dashboard, hover over “Properties” and click “Properties” on the menu that appears.
- Hover over the property you want to change and click “Edit”
- After you have made the changes you would like, click “Update”