
One important feature of any website is a contact form. One important purpose of your site is to capture leads, this is accomplished through visitors filling in forms with their information.
In this article and the next, we’re going to show you how you can create a new contact form and how to edit existing forms.
Step 1: Creating A New Form
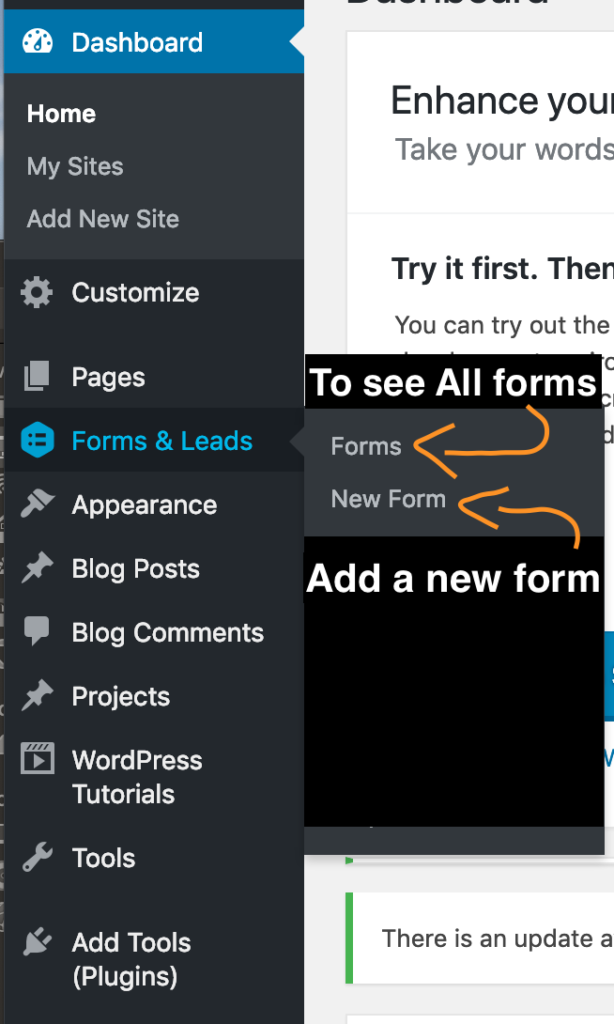
Login into Your dashboard, in the left hand menu find ‘Forms & Leads’. HOVER over that and click ‘Add Form’.
Step 2: Add a Title
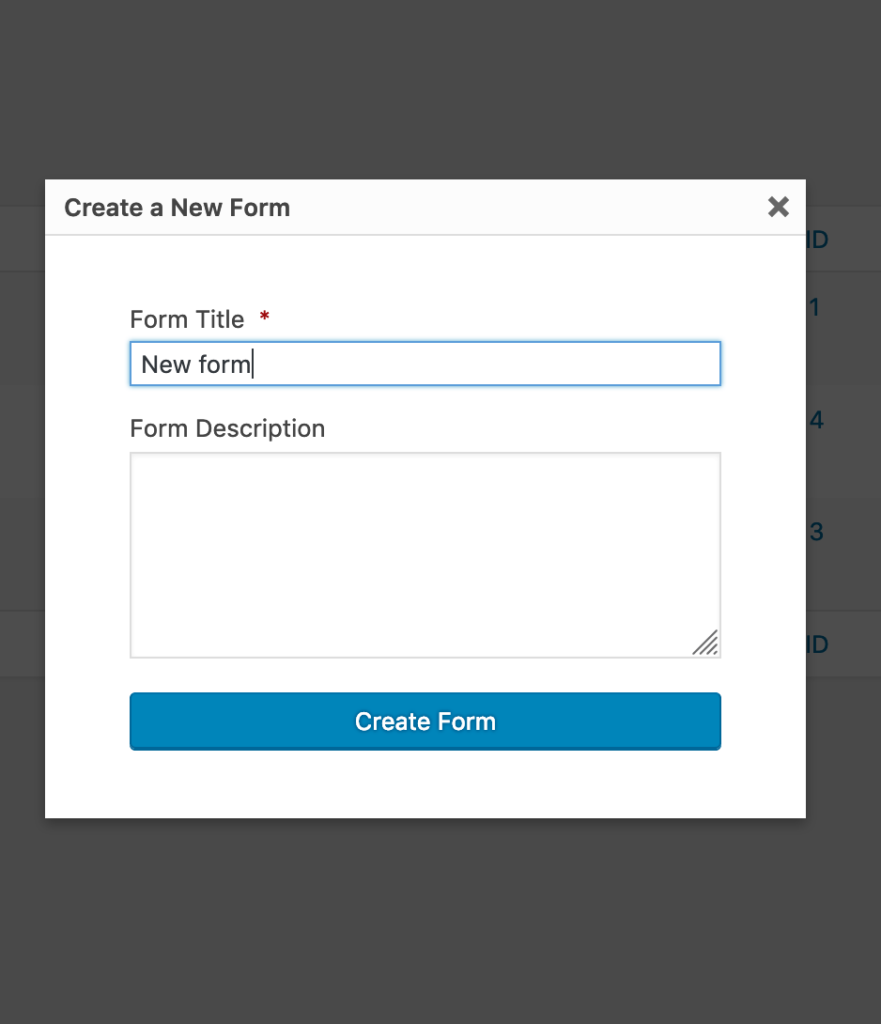
You’re going to be prompted to add a title and description. The title can be whatever you like, however it’s best to add a title that is relevant to the forms use. (i.e. Contact Us, Sign up, Maintenance Request etc).
NOTE: The description is optional.
Step 3: Adding Form Fields
Once you’ve clicked ‘Create Form’, you’ll be redirected to a new page. On this page it actually gives you the steps on how to add and edit form fields. READ THESE STEPS CAREFULLY.

Form Field Types
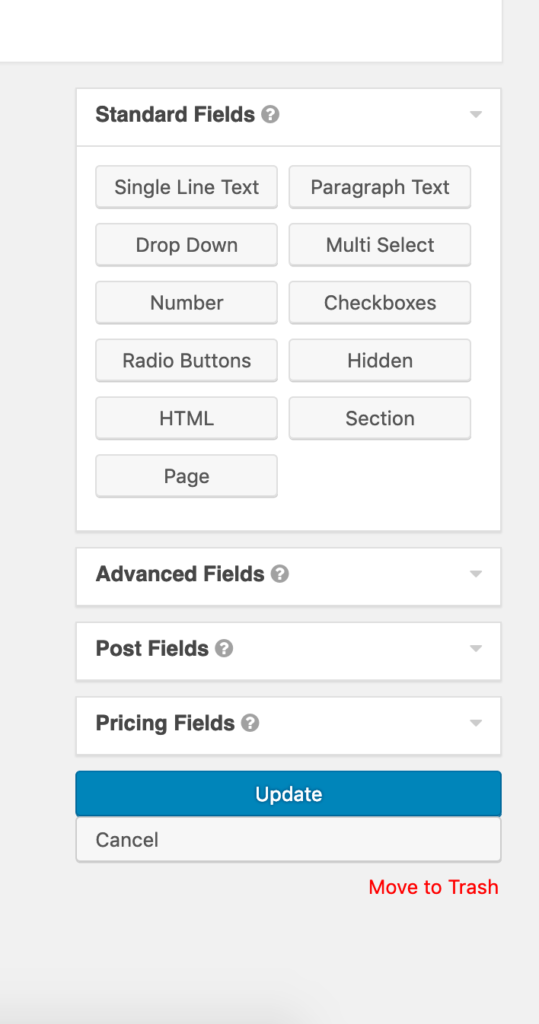
As you can see on the right side of the page there are dropdowns containing different field options. The form fields you will use most often are contained within the ‘Standard Fields’ and ‘Advanced Fields’ dropdowns.

Previewing Your Form
So once you have your form layed out and formatted to your liking, you can preview it before you place it on your page. To do this make sure to click ‘Update’. Then at the top of the page click ‘Preview’.


Step 4: Add The Form To Your Website
Unfortunately there is no easy way to add your contact form. So to help you out we’re going to provide you with the shortcode needed in order to add your form. READ STEP 5 CAREFULLY BEFORE YOU COPY AND PASTE.
Step 5: Edit The Shortcode
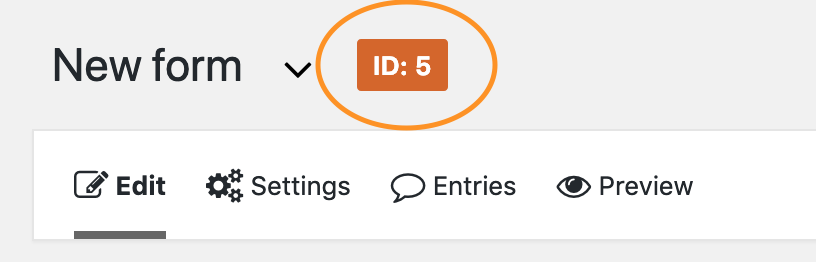
When you create a new form there’s an ID provided, this is VERY IMPORTANT and is found at the top of the page. The ID will probably be different.
In the shortcode provided CHANGE the ID to correspond with the form You made. The rest can stay the same.
[/ gravityform id=”5″ title=”false” description=”false” ajax=”true” /]
NOTE: The brackets are NEEDED ‘[ ]’. But DO NOT include the slashes ‘/’ at the beginning and end. The slashes ‘/’ were added so the shortcode would be displayed properly
Step 6: Paste Shortcode To Visual Editor
Now that you have the shortcode navigate to front-end of your website, then to which ever page you’d like to add your form to.

Once you’re at the page you want your form on, enable the Visual Editor and a Text Module. I know that may seem odd but it’s how it works. Then simple paste in the shortcode and change the ID IF NEEDED.


Adding the shortcode to a Text Module will also allow you to add any text to the page that you may want to include. In Part 2 we’ll show you how you can edit existing forms.